Tuesday, May 19, 2009

Make: Custom Step Stool

by Designing Mom Tori


I recently made a gift for my son to give to his little friend, Rohan. Ro’s mom is a dear friend of mine so when we were pregnant at the same time we knew that our boys would end up with lots of play dates and hopefully will experience as great of a friendship that we have enjoyed over the years. Anyway, I thought it would be fun to share how I made this super easy (and super cute if I do say so myself) stepstool. It’s perfect for toddlers who need a little extra help to reach the sink or who just want a place to sit that’s just their size.


Materials you will need:
1. Unfinished wood step stool (from any craft store)
2. Acrylic paint (I like Basics)

3. Paint brush (I used a stencil brush for this project)

4. Foam paint brush (similar to this one)

5. Mod Podge

6. Old newspaper or something to cover your workspace

7. Jar or cup for water while you paint along with a dry paper towel to wipe your brush as needed
8. And last, but definitely not least, my favorite supply: vintage alphabet flash cards from the Boston Bag Lady’s etsy shop . She has a TON of cute things in her shop – have fun deciding if your stool has vintage go go go cards , vintage Raggedy Ann characters , vintage crazy eights cards , etc…


Now that you have all of the supplies you need, the first step is to prep your workspace. First, cover your table with newspaper or newsprint. Then, fill your glass jar with water. Place all of the materials you need for the project on your covered table and you are now ready to start painting!


I recommend painting the bottom of the stool first for drying purposes. Simply start on the bottom with your stencil brush (I think stencil brushes are the easiest to work with on unfinished wood) and flip over when you are ready. You may need to do two coats, depending on the look you are going for.


After your piece is completely dry, place your collage materials of choice on the stool in the way that you want them to be arranged. Next, apply the Mod Podge to the cards as if it were a glue with your foam paint brush. After all of your pieces are “glued” down, simply paint a thin layer of Mod Podge over your entire stool. Let it dry – and you’re done! It’s that easy (and fun)!


Monday, May 18, 2009

Our Booklist: Flippy And Toadpole

Our second guest blogger for this week is Designing Mom Tori.
I know you'll be delighted to read about her fun picks for great books, children's art and DIY projects!


I recently met John Mese who is a of a friend of a friend and who happens to be an actor turned children’s book writer and publisher. He and his wife started their own publishing company along with an illustrator friend and have successfully been self publishing their books for the last several years. John is a very warm and friendly guy who is obviously passionate about what he does. When he saw that I was with my baby, he literally went to the trunk of his car to give us one of their books. How nice is that? I think that the quirky rhymes and illustrations are adorable - and kids love them, too!
We have the book, Flippy and Toadpole, which is all about how Flippy can be anything...such as a "Hippie Flippy", "Mud Flappy Flippy", "Sleepy Fleepy Flippy", and our current favorite: "Mighty Mississippi Flippy."


If you get a chance, stop by their website and visit their online store to peek on the inside of each book.

Friday, May 15, 2009

Balance: Recess

by Designing Mom Jackie

Oh recess. How I so miss that concept. While my public elementary school was lacking in many ways, they sure got the recess thing down perfectly. I will always look back on that mandatory respite from fractions and pronouns to play dodge ball and eat chocolate chip cookies with a big smile.

Nowadays, my recess comes at night when the kids are asleep and I am off-duty. To mix it up a bit and not feel so guilty about the crap TV that I watch and even crappier tabloids that I read, I’ve started seeking out evening workshops on crafty or culinary topics.

Given my limited time and tight purse strings these days, I look for classes that are a one-night deal, usually just a few hours. I find that this is just long enough for me to retreat from my daily routine, learn some new tricks, and if I’m lucky, make a thing or two (if food is involved, that might mean burn a thing or two).

Here are a few great local classes on my recess "wish list" for the months ahead:

1) A Moroccan Feast cooking class at
Kitchen on Fire


2) Paper Arts taught by Courtney Cerruti at The Workshop


3) Rookie Rubber Stamping at Paper Source


4) Recycled Sweaters & Tee Shirt Workshop at
Stonemountain and Daughter Fabric


5) Screen Printing: Home Edition at Richmond Art Center


6) Picture Links and Pendants at Baubles & Beads


What about you?? Please email your favorite “recess” activities.

Thursday, May 14, 2009

Make: Freezer Paper Stencils

by Designing Mom Jackie

For the past year, my friend Lisa has been organizing a monthly craft night at her house. This month, we decided to rotate houses so I volunteered to play hostess. I suggested we try a freezer paper stencil project that I had read about on Katie's blog. I am pleased to report it was a huge hit! Super easy, super fun, and super fast. I am completely addicted to this now, and find myself wanting to stencil everything in site. My husband is a little concerned. He is hiding his socks as I type this.

Supply list:

  • Image(s) that you want to stencil
  • T-shirts, tote bag, tea towels or anything else you want to stencil onto
  • Fabric paint
  • Paint brush
  • X-Acto knife
  • Freezer paper
  • Iron

Instructions:

  1. Find an image you want to use as a stencil. There are plenty of websites with free stencils or you can use an image from a book. My advice is to keep it simple when you are starting out.
  2. Lay it on the freezer paper (waxy side down!) onto a cutting mat and use an exacto knife to cut out your design (cutting it out of both the paper and the freezer paper).
  3. Take the freezer paper and iron it onto your t-shirt or fabric.
  4. Paint over the stencil with washable fabric paint (available in a zillion colors).
  5. Wait a bit until the paint is dry, and then peel of the freezer paper.
  6. Voila! You’re done.

Let the addiction begin…

Wednesday, May 13, 2009

Our Lists: Bunk Beds

by Designing Mom Jackie

Wanna bunk? My twin sister, Cathy, and I shared a room until we were 17 and off to college.

Growing up, I always wanted bunk beds. But, my mom was too freaked out to get them and opted for the twin side-by-side beds from Plummers topped with super 80s geometric comforters from K-mart. Now that we have two kids, and plan for them to share a room at some point (hopefully before they turn 17), I am starting to relive my childhood fantasy and thinking about bunk beds. Gabe will probably end up making them, but I am doing some advanced research anyhow. My mom would be thrilled to know that the ugly, clunky, and unsafe bunk beds of days past have been replaced by an amazing collection of modern, simple, and fun options.

For those of us with smaller sized kids bedrooms, I can’t think of a better way to maximize space for building forts, conducting trains, and dressing Mr. Potato Head.


Here are some of my favorites:

1. Modern Children Bunk Bed R302


2. Lollipop Bunk Bed


3. Uffizi Bunk Bed


4. Julian Shutter Bunk Beds


5. Hillsdale - Universal Youth Twin Bunk Beds


6. Nurseryworks Duet Bunk Bed


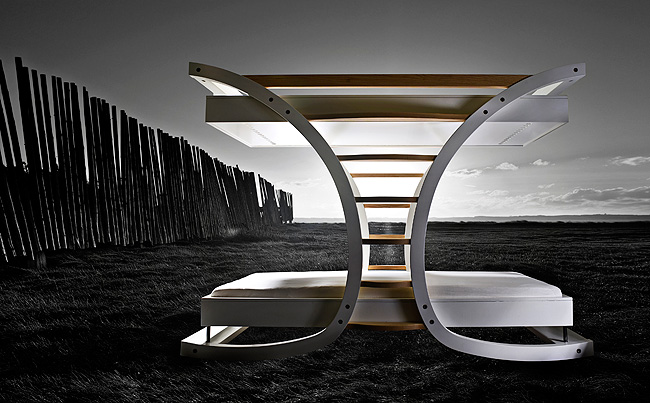
7. Wave 2 Bed by Gudiksen Design

Tuesday, May 12, 2009

Make: Name Banner

By Designing Mom Jackie

Today's craft project is a name banner designed by Louise, a mother of two little ones (4 yrs old and 15 months) who lives in Oakland, California. Louise spends her days as an environmental policy researcher at a local think tank, but loves to delve into the domestic arts (sewing, knitting, gardening, etc.) in her spare time. Hard to imagine having any free time with her dance card, but Louise makes it happen!


We thought that this project would especially appeal to those of you out there with a stock pile of fabric lying around that you don't quite know what to do with. Takes about an hour (not including drying time) and the result is simply adorable.


Here are Louise's instructions:

1) After you sort through your fabric remnants (or visit your local fabric store), cut out uniform triangles (one for each letter). I chose two different fabrics for the flags and another for wrapping the cord.

2) Next, I did a zig-zag stitch around each one so that they would not unravel. If you don't plan to hang the banner on the wall, you could sew two pieces of fabric together for each flag.

3) Lay out the triangles and space them about an inch apart to see about how long the name will be. Then take a long strip of fabric roughly this length and about 3 inches wide and wrap it around a piece of cording. Stitch this in place, leaving an even amount of fabric hanging over on each side (using a zipper foot). I used some cotton cord I had for making piping, but you could really use anything - rope, ribbon, etc.. Trim this piece of fabric with pinking shears so that there was about a one inch flap on one side of the cord.

5) Sandwich the flags, evenly spaced, between this flap and stitched them in place.

6) The last thing I did was stamp the letters on the flags. Now that I have done it, I realize that you might want to do this first in case you mess it up. But, I was sort of winging it. I decided to stamp the letters using
fabric paint. Since I did not have large format letter stamps, I carved simple block letters from rubber blanks that I had from the craft store. You could also do freezer paper stencils, embroidery, or applique letters. And, of course, you could include more flags than letters and add figures or motifs or anything.

7) Finally, I tied loops on the end of the cord to use for hanging.

Thank you for sharing, Louise!

Monday, May 11, 2009

A Creative Life: Lisa Fontaine

Designing Mom Jackie has graciously accepted being the first guest blogger for me this week. As you already know, Jackie always has such creative posts and ideas so you're all in for a treat!


I am so excited to introduce my friend Lisa Fontaine, crafter extraordinaire and founder of the lovely lifestyle blog, Picnic. She is also mama to Graham's pal, Bijou, lives in the most amazing mid-century house in the Berkeley Hills (major house envy), and loves going to the dentist. Without further ado...

What inspired you to start Picnic? It seemed like a place where I could exercise all of my interests- sewing, cooking, entertaining, photography, design, and traveling. Plus, it didn't hurt that I would be able to work around my own schedule. Being a mother is always my first priority.


Is life as a blogger what you had in mind?
In many ways, yes. It's so much fun! I love that it forces me to do the things I love everyday. I know it seems weird that we wouldn't do the things we love naturally, but its so easy to get sucked into doing chores or wasting time on the Internet.

Blogging is definitely harder than I expected in terms of the work load. I'm not very technically savvy so figuring out how to change the font on my blog can sometimes turn into a hour-long project. I am also trying to post original craft ideas or projects or recipes I have tried first-hand so each post takes a few hours to execute.


What are a few of your favorite things? Swimming in warm water, Polaroids, traveling to places that are nothing like home, mid-century design, buying something I love at a flea market for a dollar.

What are your guilty pleasures?

I'm not going to lie, I won't set foot on an airplane without a current issue of
US Magazine in my hands. Chocolate chips, right out of the bag.

What are your pet peeves?
S
notty noses, uncomfortable silence, road rage.


What are some of your favorite projects to do with Bijou?
1. Making "coffees." I bought a beautifully illustrated coloring book at Anthropologie for her but it's too nice to actually let her color in it so I'll photocopy a page and we'll color it in with colored pencils. The illustrations have a ton of detail so it's a good afternoon project.


2. Baking. We were on a banana bread kick for awhile after I scored the recipe for Bakesale Betty's famed banana bread. This week we made bran muffins and for Valentine's Day we made cupcakes. The first few baking projects were a bit stressful with a 3-year-old but now we have a system down, I measure, she dumps, she gets to turn on the mixer. I can see the little endorphins going off in her brain when she gets to turn on the mixer. I think she'll be an engineer when she grows up. My husband is still hoping for an architect.

Thank you Lisa!

Friday, May 8, 2009

Decorate: Single Most Favorite Thing in my Kid's Room

By Designing Mom Liberty


I had a hard time deciding exactly which was my favorite item in between my two kids' rooms, so I took this photo to sort of settle on a view that I love best of all. My daughter, Mercy, is all girl, but one of the things I love about her is that her favorite color has been yellow since she was tiny. (It was also my grandmother's favorite color, so my mom and I have a secret sweet spot for Mercy channeling the yellow-love).

We've lived in three different places and Mercy has had 3 different rooms, all of them yellow... the first two, I selected the color - I think it was called Benjamin Moore "Popcorn Kernel" - or something like that. It was a soft yellow. When we bought our house and moved in, circumstances made it so we didn't have time to repaint everything, so her room was this very intense yellow that I would have initially changed, but have since grown used to. She and I (together) added the stenciled stars and swirls around the room at her eye level - a memory she brings up often, suggesting with the adorable sincerity of a 4 year old, that we add the same swirly star stencils to other rooms in the house. (momma says, "um, no").

This view also includes a pennant banner that I made for her 3rd birthday party, which we held in the house the day we received the keys - a big celebration in an empty house. It was a pirate party, and I had commissioned Designing Mom, Tori, to illustrate a little "Pirate Captain Mercy" cartoon for the decorations and invitations. I made iron on patches from the drawing, put them on an old t-shirt, and interspersed them with cute girlie fabric flags.

The centerpiece of the photo is a baby quilt/wall-hanging that another artist friend, Holly Rosenberg-Lester, made for Mercy's room before she was born. I was decorating the room with vintage fruit sign stands and strawberries - so you can see the influence there, but the quilt remains in the room - a testament to art, sewing, friendship, and the expectancy that was there as we waited for her arrival.

Thursday, May 7, 2009

Cooking and Kids: Salt and Pepper Alphabet Blocks

More fun with alphabet blocks... I thought these salt and pepper shakes would help brighten up the kitchen.

Shop: International Alphabet Blocks

Why not have them be poly-lingual by the time they are potty trained? These hand carved alphabet blocks are made of bass wood and can be ordered in Spanish, Greek, Russian and French just to name a few! I think they'd make great gift items too.

Wednesday, May 6, 2009

Our Booklist: Cloudy with a Chance of Meatballs

by Designing Mom Liberty


When I was a little girl, a family friend would read this book to me over and over and over. When I grew up, she gave me that original copy of Cloudy With a Chance of Meatballs (by Judy Barrett) and I kept it until I had a preschooler of my own. Now I do, and I am amazed and delighted to learn that she, too, considers it one of her favorite books.


I hear rumors that there is a movie coming out soon made from this book, which would be really fun to see. I'm not sure if it would match my imagination of the magical land of Chewandswallow where all the food comes from the sky and the people just reach out to grab their meals. (Now wouldn't that be convenient, considering that mealtime are my hardest time as a mom!) My picky eater loves this book so much that we brought it to preschool to read to the entire class - they, too, were enraptured.

The artwork is great, the story is magical, but short enough for a quick bedtime read. I actually just bought a second copy on Amazon tonight, because our sentimental copy is so worn that it's falling apart more each time we read it.

A Creative Life: Tour of Liberty's Home

by Designing Mom Liberty

I grew up in an ultra-modern white-walled home, the child of an industrial designer with architectural handwriting and a love for the tightest and cleanest of modern design. There was artwork everywhere and my parents regularly came home with new sculptures when they were on vacation. That's a funny thing to keep in mind when you look at the home my husband, Jay, and I have made.


When we were engaged, I was up to my eyeballs working on a team where we were designing a very sleek, mid-century influenced product line at Milliken (see here ) and I never would have imagined that Jay's love for old, worn and handmade things would overpower 25 years of appreciating the opposite. But our first home in Chicago was a 2-flat built in the early 1900s, and when we bought our first place, it was a tiny 1916 Craftsman bungalow in Oak Park, IL - which was the hometown of the Arts & Craft Movement and Frank Lloyd Wright .

That said, here you can see our 1922 Los Angeles Craftsman bungalow. We managed to find something that speaks to our time in Chicago, wears our furniture perfectly and pretty much feels like I walked into my own heart every time I come home.

I love living here. It's bright, and old with lots of quirks. (Kind of like us.... except for the old part).

Tuesday, May 5, 2009

Our Lists: Shelving

Thought I'd kick start a list for shelving. There are a plethora of amazing ones out there, so these are just some I've had my eye on. They are on the pricier end (except for the A-Z one which is on sale!) so I'll try and put together another one that's budget friendly. If you've seen some great shelving for the litte one please help in adding on to this!

Our Lists: Children's Art

I love the prints that Bold and Noble have for the wee ones. From Noah's Ark to a Robot Alphabet (I've got my eye on that one)...they even have a chart to add to Jackie's growth chart list!


Monday, May 4, 2009

A Creative Life: Treasure Hunt

By Designing Mom Jackie


For Graham's fourth birthday this summer, i am planning to have a big treasure hunt with all his friends. Yes, i am already thinking about this three months in advance. It's just my nature to plan, what can I say. I decided to try a treasure hunt with him today to see if he would understand the concept of a treasure hunt, as we've never really done it before. I gave him a blue box and asked him to help me fill it with treasures from our street. He was delighted! We found a green leaf, a white rock, an orange peel, an acorn, blades of grass, and a few other goodies. I'm thinking of making this a weekly outing that I will document and then put together in a book for G as a keepsake. Here are some pictures from today's outing. More to come!


Friday, May 1, 2009

Shop: Haute Frame Decals

by Designing Mom Kate
I thought it would be cool to put up pictures of all of our family members so Oscar can learn their names and faces, especially since we moved to Portland and aren’t as geographically close to family anymore.

These haute frame decals are just too cute and a great way to keep the photos updated.


Shop: Unique Los Angeles


If you live in the Los Angeles area, Stacy of "By Simple" sent over info about a great show that she will be participating in along with other indie designers. It's the Unique Los Angeles show May 2-3 at the California Gift Center. Click here for more info!
Related Posts with Thumbnails