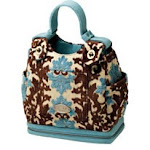
Having been invited to spend a few days with my oldest friend and her girls at their family's home on Hilton Head Island, I thought it might be fun to make totes for the girls in an effort to bag a few more days of summer.

Supplies -
1/2 yard of medium-weight cotton fabric
1/4 yard of contrasting fabric (for the bottom panel)
1 yard of ribbon or cording for the handles
Thread
Interfacing
Button making kit
Yardstick
Fabric marker
Scissors
Straight pins
Notes -
All seams are 1/2" and included in all cutting measurements
I was able to find my fabric, button making kit and the interfacing at Peapod Fabrics in the Sunset (peapodfabrics.com). It's such a fun shop filled with all sorts of coordinating prints.
Instructions -
1. Measure and mark your dimensions directly onto the wrong side of your fabric using your yardstick and fabric marker, then cut out your fabric pieces.
For the top: cut 1 panel 15" wide and 9" long
For the bottom: cut 1 panel 15" wide and 3" long
2. Cut and fuse interfacing to the panels (following directions on the package).
3. Pin top and bottom (right sides together) pieces together, stitch.

4. Press seam open, then down.
5. Fold in half (right sides together), pin, and stitch together. Start with the bottom seam, then each side (one side will be folded).
6. Roll top over twice, press, pin and stitch.

7. Cover buttons (following directions on the package).

8. Cut your ribbon or cording (for my tote, I used 15" handles), pin and stitch.
9. Stitch buttons on top of handles.


No comments:
Post a Comment